Using AEB Mode to Enhance Your Photography
Finally learn Auto Exposure Bracketing Photography methods for yourself in 2025.

Photographers constantly need to sharpen their skills to stay relevant and effective.
Some of the best choices you can make are the simplest ones, like learning the features your camera offers.
The feature we will be discussing today is AEB Mode
Now before you start getting creative with your acronyms, let’s stay on topic and broaden your photography skill set.
What is Auto Exposure Bracketing?
AEB aka Auto Exposure Bracketing, is a camera mode that takes a photo at a user selected exposure alongside an underexposed and overexposed shot.
Depending on which setting you choose, the camera will take either 3 or 5 shots at different exposure levels.
These shots will be merged later to create one ideally exposed HDR (High Dynamic Range) image.
How do I shoot in AEB Mode?
Shooting in AEB mode is as simple as navigating to your cameras shooting system and turning AEB mode on.
This will vary between camera makers/models.
Next is too decide the amount of shots & exposure variance for each shot.
I typically choose 3 shots with a .3 incremental change.
Finally, set a timer delay to ensure your camera doesn’t shake and let the camera complete the job.
Rinse and repeat.
How do I merge my images together after using AEB?
The AEB sequence will provide you with a set of underexposed, normal and overexposed images.
The next step is merge the 3 pictures into an HDR photo and utilize each composition into a single shot.
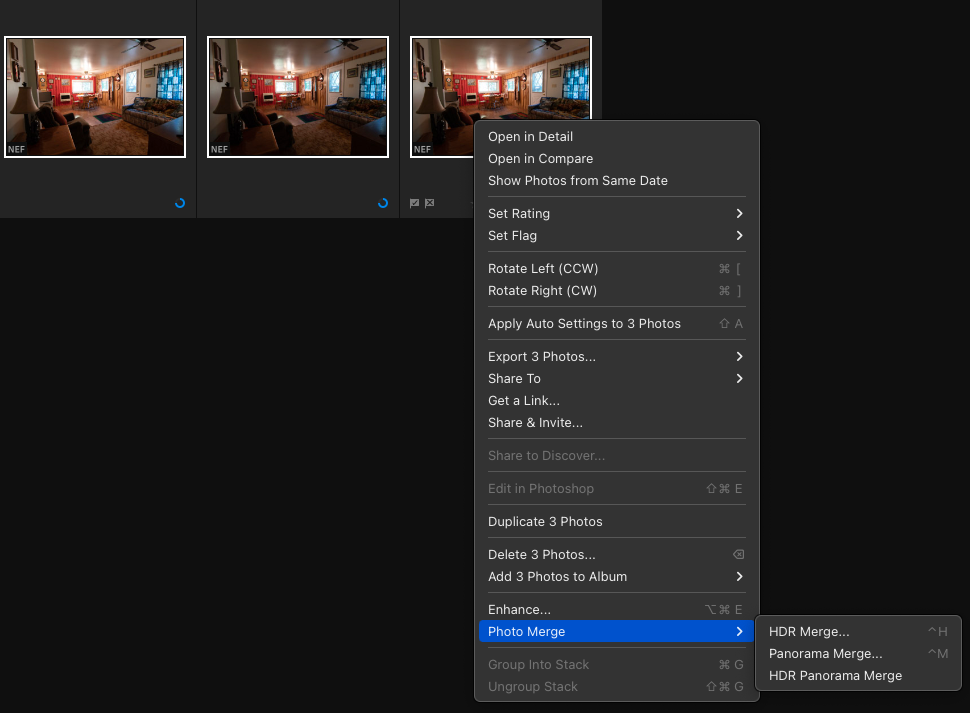
Lightroom users, right-click one of the images after you have selected them and select
Photo Merge –> HDR MERGE.
Allow the images to process and hit merge in Top right.
Job Complete.
Why photographers use Auto Exposure Bracketing
I always use AEB when shooting Real Estate photos for clients.
I also use it in many other shooting scenarios but primarily for real estate photography.
So why would this be the case?
With different exposures, a photographer can combine the properly exposed highlights, shadows, and mid tones into the perfectly balanced shot.
More AEB Photography Tips
RAW – Shoot RAW, always. Your creative ability in post processing outshines JPEG by light years.
Conditions – Like any other time shooting, plan for where you will be flying.
The ideal scenario for AEB shooting is not in windy conditions.
You want to be able to capture the same moment 3 times in similar fashion and not have any major movements.
Explore More Photo Resources
Thanks for reading and hope this has helped anyone who shoots in AEB!
Looking for more photography resources?
Check out my guides below: