How To Add Boundary Lines to Photos in Photoshop
So, you’ve been tasked by a Realtor or Real Estate professional to highlight the specifics of a property you’ve just photographed.
Great, but you don’t know how to add boundary lines to make your deliverable complete.
Don’t worry. You will be covered here.
Open Photoshop with your Images
First things first, launch Photoshop and load your image.
Find the Pen Tool & or Freeform Pen Tool
There’s two ways in Photoshop to do this edit, actually probably more, but for this we will be using the Pen Tool and or Freeform Pen Tool.
Pen Tool Users – Create boundaries by plotting points along the property lines.
Freeform Pen Tool Users – DRAG around your property and release once set.
Manipulating the Boundary Lines & Fill
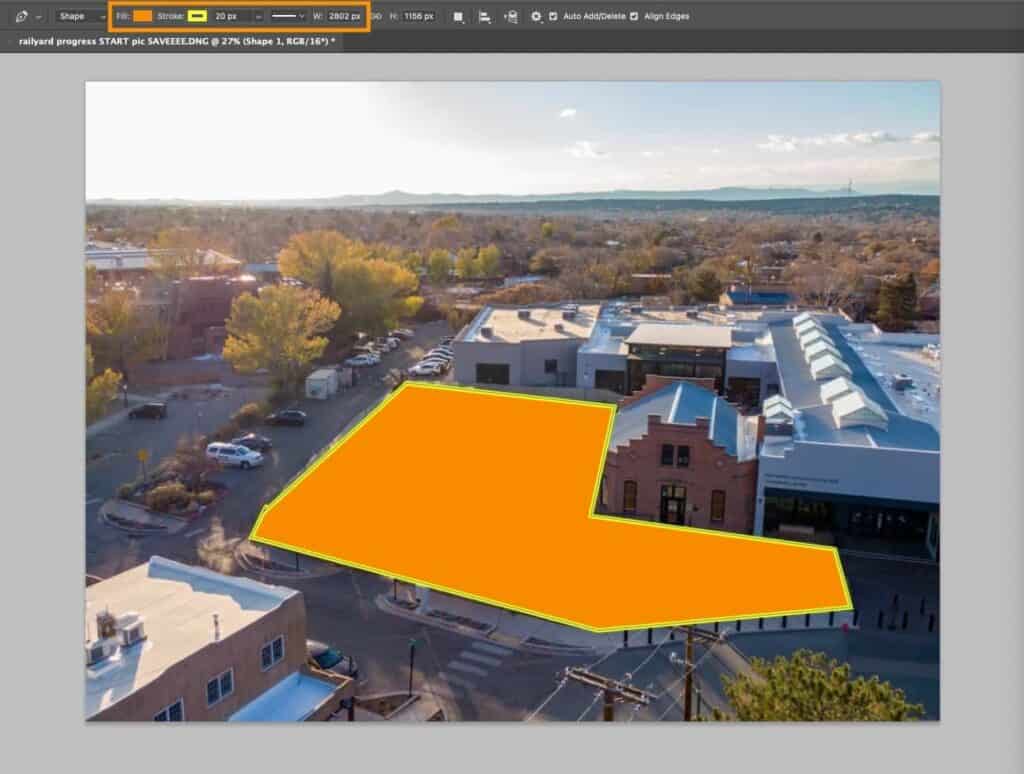
With pen tool/freeform pen tool selected on the sidebar, navigate to the top left and find fill/stroke.
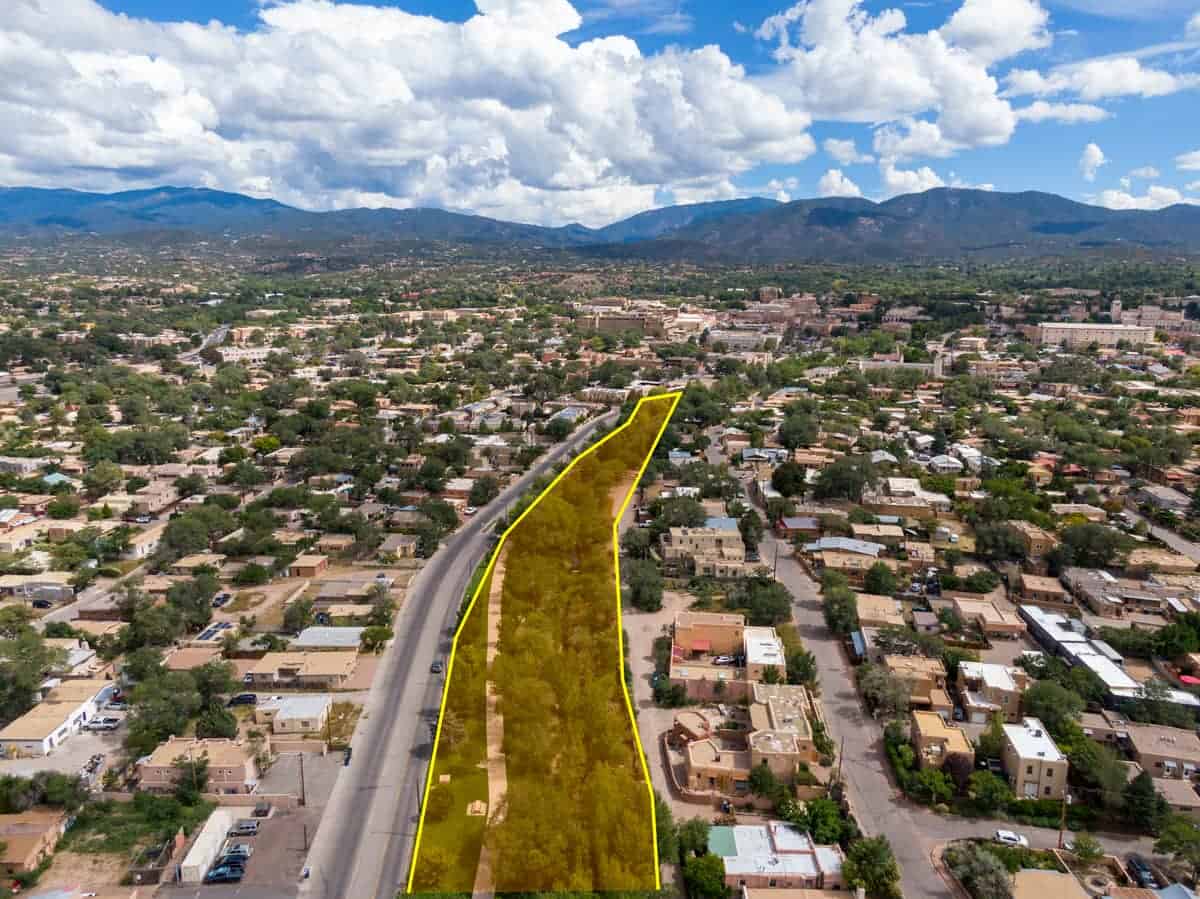
Referencing the example above, expand your stroke (boundary) to your desired width, and change/use your fill (center orange) to your liking.
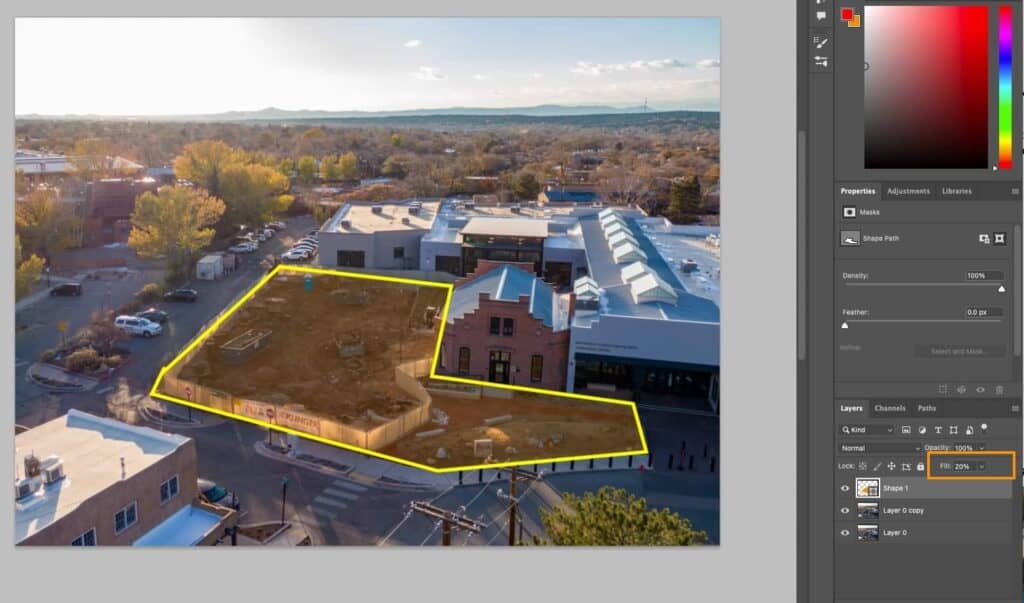
To change the fill opacity (to actually see the property), head to your layers and change the fill % to a lower number. 15-20% is pretty standard on my end.
That’s it!
You have created your first set of photos with boundary lines!
If you still need help or just don’t want to do it, shoot me a message to discuss pricing options!
More Photography Resources To Explore
Learn more Real Estate Photography Tips to up your game in 2023: